Thursday, November 3, 2016

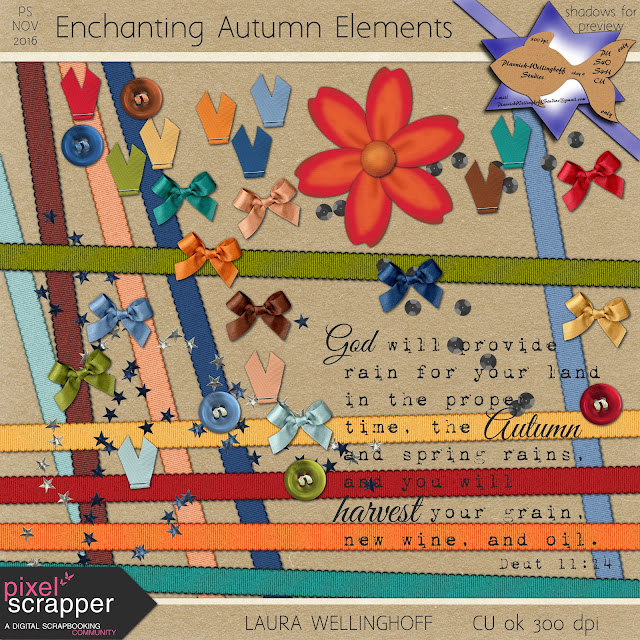
Enchanting Autumn, PS Nov 2016

It's time, or rather past time as I'm late again, for another Blog Train.

November's theme: Enchanting Autumn

You'll find some journal Cards, some in horizontal and vertical formats.  October was our first spent in Southern MO, and we ventured into northern Arkansas for a day trip with friends.  That's where the Mill and Pond were photographed.  The elk at sunset I had to throw in, as we spent an evening listening to them bugling, enjoying a fire and pumpkin pie with friends.

This Autumn was "enchanting" for me again, having spent many falls in New England, I really enjoyed watching the leaves change again!  I hope that some of these goodies are helpful for you as you document your autumn activities.

You can download the entire bundle in one go by clicking on the photo or the words beneath.


https://goo.gl/yQhBwI

Enchanting Autumn Bundle

Or you can download only the specific kits that you are interested in.

https://goo.gl/NhOsNU

Elements


https://goo.gl/ISGEuq

Journal Cards


Download Solid Papers

Solid Papers


https://goo.gl/WKhIWU


Patterned Papers

You can find the full Blog Train listing here.
May God bless you!

Saturday, October 1, 2016

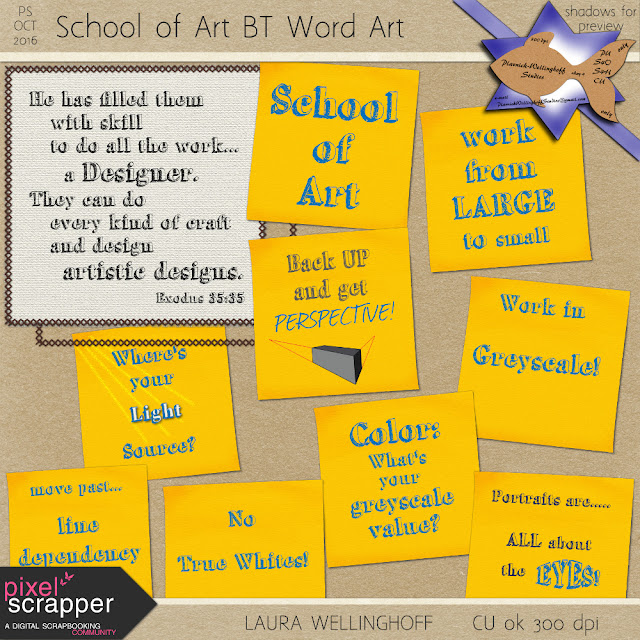
School of Art, PS blog train October 2016

So each time I do a blog train contribution, I end up learning a lot about the programs I use, Gimp, Inkscape and ArtRage.  This time was no exception.

The horse head sketches were especially fun, to take and share snap shots of the creative process.  The Post Its were just some of the technical thoughts that run through my mind, taking me back to High School days. Some are items I especially need reminding of...not so much the exact phrasing but most of the time something I could use to apply at least a part of.  Like "Back UP and Get Perspective" for me was always about the backing up to get a feel for how the project was going to be enjoyed as opposed to getting lost in the details of it all.  Though I had to use a lot of vanishing points as I learned to study blue prints to convert them the old fashion way to an artist's rendering of the structure.

Some of the phrases, my classmates and I just heard a lot, so it just felt right to include them.  Most probably won't get used on a scrapbooking page, but then one never knows. Though we homeschooled, I never really took a chance to work with my kids on learning how to sketch or paint, though both have put their hands to the paintbrush and canvas since.  Actually my daughter shocked me with a FaceTime call, wanting advice and a critic of her latest painting, as she needed another pair of eyes to find out how to tweak the lady in her project.  She changed from her sketch to the canvas, and though some of the changes she loved others were causing her just a bit of trouble.  I might just have to make another post it, "reference, reference, REFERENCE!"  Or perhaps "A reference photo is NOT cheating!"

Anyways hope you find something you can use, as you set about "sketching" your memories.

So now on to my contribution to the School of Art blog Train.  Happy Digital Scrapbooking Day!

You can click the photo to initiate a direct download, or grab it from the links below.  Some of them are too large for Google Drives automatic virus scanning, so it's smart to check them with your own virus checker, even though I'm clean you never know.

goo.gl/AFKowt

School of Art Bundle


goo.gl/m0b88s

School of Art Elements

https://docs.google.com/uc?export=download&id=0B9470WkeN5-dUnJ3cElKYmZ3aG8

School of Art Journal Cards


goo.gl/PNC6do

 School of Art Papers

goo.gl/v5CPux

School of Art Patterned Papers


https://docs.google.com/uc?export=download&id=0B9470WkeN5-dSGEwRmNPWF9CdXc


May you have a great day and may you see God's blessings!

As always if you have any troubles, comment below and I'll do my best to help, also just leave me some love or a critic.
There are also some other great kits in the train, so head over to Pixel Scrapper forums.

Pixel Scrapper October Blog Train

Well, I've not got all the finishing touches on my portion of the October blog train, but thought I would post previews.  Links coming ASAP.  So check back soon.


Monday, September 12, 2016

Adding a Color Sample to a Collection in ArtRage

This is for those who don't know how to add a Sample (color palette) to a Collection in ArtRage.

I thought I had found a great fast way to get a color palette from GIMP into ArtRage.  What I found at the ArtRage forums would be great if you are just wanting colors very close, but as of now they are not exactly "on point" with the HEX codes. (Link to help you easily create a Custom Color Picker.  I know the problem is not with the "add on" .exe, but with the way ArtRage is grabbing the colors, so you may still want to grab this from the ArtRage forums.)  For now I'm still going to load the colors into a "Sample", using the Precise Color Picker to match the Red, Green, Blue values to the same numbers as are shown in GIMP with the HEX codes for each color.

Since this takes a little longer to adjust these 3 settings for each color I thought I'd share the .COL file with the others at Pixel Scrapper who might be working on the Blog Train in ArtRage.

If you have ArtRage, but don't yet know how to load a .COL file from someone else, here's how you go about doing it, and here's my .COL file for the 2016 11 PS Enchanting Autumn Blog Train.

The "Samples" window usually sits in the bottom right corner, just in front of the Color Picker, so you can click on it and expand it so you see the window like I have in the pictures below.  (#2 below)


Here you can see my Custom Color Picker that is a little off, but still there are times that it would be nice to have your own colors in this palette.


If you have colors in your samples, be sure to save them before moving on.....like this.


Now we're ready to import the .COL file with the new Samples by clicking on the lines to bring up the menu.


One of the great things about ArtRage is their programmer have built multiple ways to do the same thing.  You can either click the lines to the right of the Samples window or
Tools > Color Sample Options > Replace Samples > Load from Disk   (Being sure to have already saved your samples...This is one place that Art Rage would be improved, by showing the name for the Samples if there is one assigned.)


Browse to the location of the .COL file on your computer.

Once you have loaded the Samples, you can also add this sample to your Collections, to be able to bring it up quickly at a later time, so that you don't always have to navigate to the folder on your hard drive.
Just pull up the menu options again, from the Samples window, and just simply Add to Collection.


You can "Add a Group" to your Collections or select a Group Name from the drop down arrow menu.


Again, I've clicked the lines to the pop-up window and "Add a Group", I called my new group "Blog Trains", then gave this Sample list a name.  Now it's easier to load the Samples from the collection.  When you want to pull up a Sample that's been added to your Collections....
Tools > Color Sample Options > Replace Samples > Select from Collection.... (or....


OR.......
 Tools > Color Sample Options > Add Samples >


 But you may not want to have your colors ADDED to your Samples....so
You may want to first clear the Samples, being sure that you've saved those colors in a sample before clearing it....if you had color already in the Samples window.  As you can see below, you can also Add or Replace from the Samples window menu.


Below is what the Collections window looks like, even though it's labels Sample - we are still talking about Samples...it would be better labeled Sample Collections.  The Groups are on the left, and then the Name you used for the Sample will appear in the middle.  Once you click on the name you'll see a preview of the colors saved under that Name.  A much easier way to manage your colors, than getting them from disk, especially considering that you get a visual preview of the colors!


I hope this helps you navigate ArtRage and color collections inside of it!  Enjoy creating.

Saturday, August 13, 2016

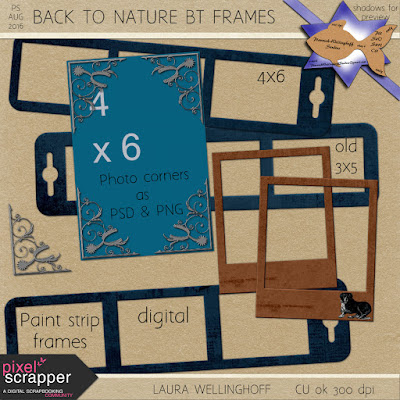
PS August 2016 Back to Nature blog train

Many changes since we last posted a freebie, but we've still been creatively creating, just too busy to share.  Who said life slows down the older you get?  Don't believe them!

Still learning a lot about digital painting!  But I couldn't pass up this months theme at Pixel Scrappers...so Monday, I decided to get serious about a kit to share.  

We've been enjoying southern MO, and showing friends and family around the area, including our kids! Trail Riding and canoeing, along with just hiking to see the wonderful springs here in the Ozarks, is a big part of life here.  So 'Back to Nature' had to include some of the gear for the trail rides, saddle, spur, and don't forget the dogs!  They wouldn't be happy if you left without them, believe me we know, as our lab mutt is still adjusting to life here in the Ozarks, or rather we are, before we attempt to take her city nose out to far into the country.  

So many of the other wonderful contributions included the river activities that I decided to just focus on the riding, even though we had our first chance just last week to get out and "float the river".  Though I don't think our son set his paddle down more than a few mins, as we did 10 miles of river in less than 3 hrs!  The first half of the trip, I think he was just excited to get a good workout, the last half - well let's just say it was his stomach.  We had only brought old sunscreen and two water bottles with us, not thinking we'd head farther north before putting in, or planning on doing more than 5 miles, but when someone is lending you the equipment and makes a recommendation, the guys listen up!  After you've snagged my goodies head over for more at Pixel Scrappers!  You'll be glad you did.

One more thing, our family has been hit hard this last year with cancer.  It's probably effected your family or friends as well.  If you'd like to donate to help those still battling and for research, please head over to my Relay for Life fundraising page.  Even a little bit could help find a cure, or supply someone battling with a ride to treatments or fill a stomach with needed nutrition drinks, and you'll feel good for giving back.

Now to the freebie.  You can grab everything in one download if you wish, just click on the bundle preview.

https://docs.google.com/uc?export=download&id=0BzkJWXvL__w7ZlhBTlRVZThneEU

Otherwise click on the photo of the parts below that you'd like.


https://docs.google.com/uc?export=download&id=0BzkJWXvL__w7TkkwY3ZaWGZneGM


https://docs.google.com/uc?export=download&id=0BzkJWXvL__w7c3VJVENhQnlMTEE


I've even created a few 8 1/2 x 11 papers, if you're interested.


I hope you enjoy using these.
*Back up and running, thanks for your patience.

Saturday, July 30, 2016

GIMP Tutorial: Toggling Layers Visibility

This GIMP trick is in a video format and is up on YouTube for you to watch.  It was just easier to let you see my screen that way.

I was watching other GIMP tutorials on YouTube, and stumbled upon this trick, but when I tried it out the next day, cause toggling on and off visibility to layers is a great feature, I realized that I usually leave a lot of layers in my projects even though I don't want them visible.  So I decided I better test this new trick before using it in my project I was working on.  And I'm glad I did, cause there's something important that I had to figure out how to do.


Let me know if it was helpful for you.

NOTE: you can watch it directly on my blog, but an iPad it didn't show the YouTube notes on the screen, so if something is confusing, please click through to YouTube and see my notes there.

Tuesday, August 5, 2014

Autumn kit: color Palette

Well, I'm developing a color palette for another kit I'm just beginning.  Don't know when it will be complete...lol


This is the palette I'll be starting with.  I found it on Pinterest, but I've selected and added the HTML codes for the colors that I liked best within that color range.

The reason I went with this palette, I think is because I grow up in New England during some of those early years, and so I love Autumn.  No Other place has Autumn like the New England states and Up-State New York.  The brick buildings are also a love for me, no doubt again because of that area.

So this is where I've started for my autumn kit.

Disclaimer:  I looked for the link in my Pinterest, but I'm not finding it right now.  You'll note that the original photo came from brandigirlblog.com  Again I'm not sure where on their site at the moment.

Friday, August 1, 2014

Realistic Shadowing "all around" an object in GIMP.

Hello, I know I was so quiet ALL this calendar year!...sorry but things have been very busy around our home, but I'm back, YES AGAIN.  SO SOON...with another GIMP Tutorial.

This is on how I've been doing shadowing of an object within GIMP.  Now bare in mind, I've not learned "Script-FU" or Python-FU"...so if you're working at that level, I'd love to see a tutorial from YOU!  PLEASE share in the comments section.  I'm thinking these are GIMP's version of "macros"?

When I made the move to digital scrapbooking, I wanted to get a realistic 3D look to this 2D format.  That's been my style even in the painting and sketching that I've done in the "real world"...so this is also my aim in the virtual world.

To that end, my art background leads me to want a slight shadow all the way around an object and a deeper shadow opposite the light source.

If  you are mathematically inclined you might want to also catch my post covering the difference between GIMP Shadowing and Mathematical graphing, because they are NOT the same.  (I'll be linking to this post a little later, so check back, if you have a mathematical background and have found it a little confusing in GIMP.  It may clear some things up for you.)

Before I walk you through how GIMP does it's shadowing, take a look at what I mean by a slight shadow all around an object.  I picked this banner shape from Janet Scott's One Stop Bunting Shop - Shape Mask Flags Template Kit over at Pixel Scrapper Digital Scrapbooking.  With this flag, we can see several different angles as we do our shadowing.


While sitting on the object's layer, select your shadowing 
Filters> Light and Shadow> Drop Shadow....


Gimp let's you control these items...
Offset of X
Offset of Y  - Offset X & Y is how far in pixels, GIMP should the move the shadow from the object.
Blur Radius
Color
Opacity of the shadowing
ALLOW RESIZING - if needed GIMP can allow a layer or image re-sizing if needed. (Be Careful with this because you don't want your image size to go over the 12" x 12" or whatever size you are using...ie if the object and/or the shadow moves "off" the edge of your paper size, if this is checked GIMP will increase the image size to accommodate the shadow.  In most scrapbooking cases, you DO NOT want to do this.  But if you are making an "asset" that is on a transparency, like the case of a PNG file, then you need to make sure this is checked or you'll lose part of your shadow as it gets larger than the objects layer and get "cut-off" in areas.)

By putting a slight shadow all the way around the object, this separates the item from what would be underneath or behind the object.  Something that our eyes automatically does with even "paper thin" objects in the real world.  But to do it in a 2D environment, our eyes need a little bit of help.

The shadow, that I usually place in the lower right of my objects, give the effect of a light coming from the top left of your desk.  This is the typical place for a light to be placed, at least by those that are right handed, which let's face it, is the majority of people...even though I'm ambidextrous, and often do things as a lefty would, I have stuck to this format.

This light format is also the format that GIMP uses, so they have made it easy to place the shadow in the lower right of the objects by using positive numbers for X & Y offsets.  (NOTE: This is where GIMP and Mathematical quadrants deviate.)

Since our deep shadow is a paper item, we will move X and Y offsets both 7 places or pixels.  So enter seven for both X and Y offsets.  In the Photo below I've entered 7, and used a blur radius of 21.


In the photo below you can see the deep shadow in the object.

Now we will enter a smaller shadow all the way around.  So let's make this one offset by 3 pixels.  To place the next shadow, we will do it in the quadrant opposite the deep shadow, by using BOTH negative numbers for the offset of X & Y.  Also we will make the shadow significantly lighter by changing the opacity to only 30%.  This way, there is just a hint of shadow and where they overlap will not be stronger than the deep shadow.  GIMP does allow for you to be able to adjust the opacity at a later time in case you need to, but the other variables are set within that Drop Shadow layer.  You'll also see in the screen shot below, that I've renamed the layer for the first Drop Shadow, adding the variables that I used.  I do this not only so that I can remember what still needs to be done, but also so that I have a reference point to look at, when trying to decide how strong the shadows for other items in the layout need to be.  Depending on what the item is, how thick it should be, I might adjust and change my numbers.

When working with the blur radius, what we are doing is like air-brushing or using a spray can.  How tight is the shadow density...how many of the surrounding pixels are going to be blurred?  As a general rule of thumb, I usually make this slightly larger than the offset number.  So let's drop the blur rate on these lighter side shadows to 7 pixels.


Now only negative offset in the X, and everything else stays the same.


One more time with the Negative in only the Y offset.  After using the Drop Shadow once, there are also some shortcut key strokes you can use.  Shift-Ctrl-F controls the pop-up of the last filter.  Use this if you need to change the variables to make the shadow.  Ctrl-F repeats the last filter used, in this case the Drop Shadow.  I use this short-cut to speed up the amount of time I spend shadowing assets.  IE I'll do the deep shadow on several items that are about the same thickness, then I'll use the Shift-Ctrl-F and go in and change the settings for the next shadow layer.


To rename the layers, I double click on the layer name, to gain access to naming it.  There are other ways to rename layers, but this is quick and convenient.  Just remember to get yourself back to the object layer, or you'll be making a shadow of a shadow!  lol.


You can right click on a top layer, and "Merge Down" to combine all the shadows, or the object AND the shadow.  Just remember this "Merge Down" is the same as "flattening the two layers...because you loose the ability to work with the layers individually.


I hope this helps you get a firm grasp on using the Filter Drop Shadow in GIMP.

Thanks for stopping by, and if you have any questions, or found this helpful, leave a comment, I'll try to answer or do some research if I don't know how to answer your question.

Enjoy!

Laura

Tuesday, July 29, 2014

A Neighbors Blog

I wanted to share a story that has bless my heart, every time I hear it, so I thought I'd share a link to his blog.

Josh and His Praying Heart On Autism

Josh is our next-door neighbor.  I pray that you are blessed as you visit his blog, and hear from him about his walk.

Enjoy!  And if he encourages you, leave him a message, it will make his day!

Laura

Friday, July 18, 2014

Wanting to Post some of the Tricks in GIMP I'm Learning....

Well we have laid our 11+ year-old laptop to rest, and we were forced to upgrade...we've known it was coming, but just couldn't justify the expense.

So now I am having a time learning Windows 8.  Things have advanced so much that I'm not even sure where to start at times.  Strange, for someone who graded computer programs without even taking a course.  It was all so new to our high school that when I couldn't fit the class into my schedule, I was offered a grader position.  There were no textbooks and my work for course credit consisted of reading through the programs written by the students on the old green and white track-feed paper.  At the end of my daily work time, I would return to Mr. Kohler's classroom, and spend 3 minutes talking with him about the new commands the students must have learned in class.

"If this means such and such than the program works.  But if that is incorrect, then instead it makes a loop, jumping to do this, needs a closing punctuation, or opening punctuation," ....or whatever else I could think of as I spent 20 minutes during my lunch comparing 3 classes worth of programs, finding those that usually got things right, comparing these with others, and with logic and common sense (something that is usually never taught anymore) "then everyone in the class has a program that fails.  Or these fail, but this one works....this program gets stuck in la la land with a loop that they'll never see"  etc, etc, etc.

Anyways...I feel like I did when at the end of the course, I finally got a chance to actually type in MY OWN program, and see if I had learned anything...and the moment the computer spit out the correct answer, smiling...thinking..."I knew I could do it!  COOL!"

**********
Anyways, I'm excited that with my new computer I actually have some processing speed, and I don't have to wait 30 minutes to an hour before bailing on GIMP because I couldn't get it to open up my Scrapbooking Page.  Or trying to figure out if I should SAVE before giving it another task, or if it would take too long - another 30 minutes or more - before it would be done...

I've set a goal with some over at Pixel Scrapper Digital Scrapbooking to get some scrapbook layouts done this July.
Seven is my goal.

But I started wanting to share a few GIMP tricks that I just found out about as I've been working.  I've left the screen shots at almost the original size...hopefully you can see the details in them...more on that later.

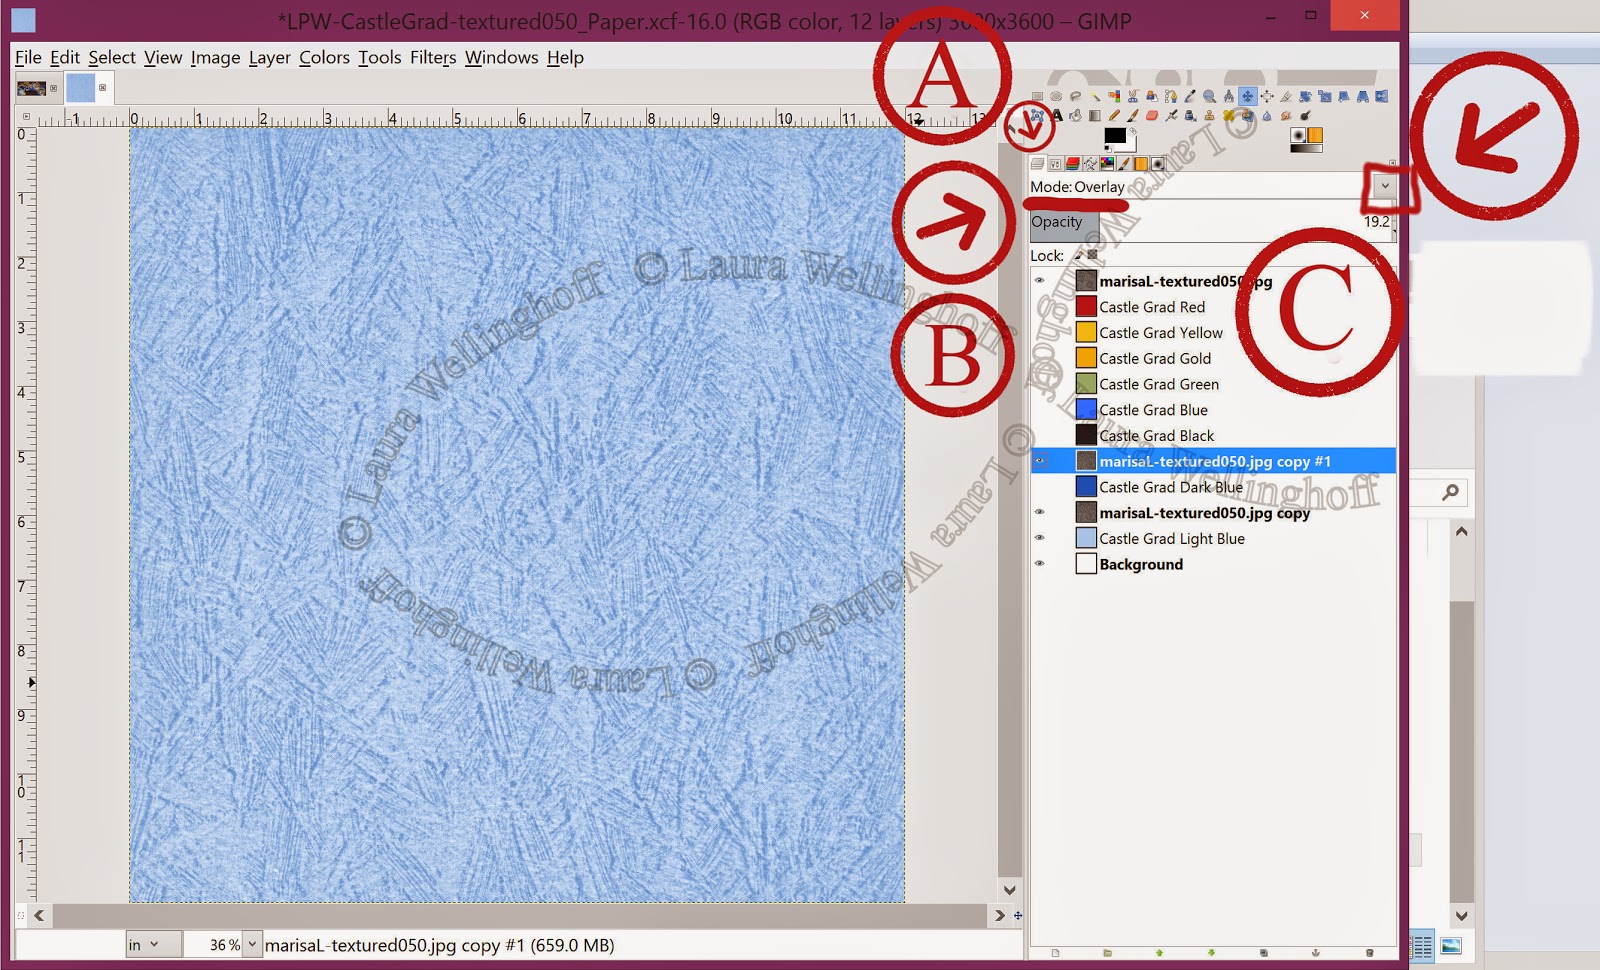
1) In the Layer Tab > (A in the screen shot), you can actually select a MODE (B) from a Pull-Down (C).  I don't recall even seeing it in GIMP on my Windows XP version, but it's there just above the Opacity meter!
  So I've been tinkering with the Overlay...to make some graduation papers.


2) How to find your layer....
  Since I now have more processing speed and power, I am not having to piece things one at a time.  Work on one section of a layout...save it as a PNG when I had it the way I thought I wanted it, and then close it and move to the next section.  I love begin able to work with everything easily... BUT this brought up a new hurdle.  How do you quickly and easily find that item (or "asset" as the smaller elements are called in digital scrapbooking) in a Double Page Spread, .  Well, normally I set the MOVE tool (highlighted above the A arrow), under the Tool Tab (A)...to Move the active layer (B)...(C is pointing out the three different items that you can move...Layer, Selection, or Path).  Moving the active layer is very helpful when painting on a transparency layer or a mask layer, so that you don't accidental end up working on a wrong layer.  NOTE that each tool has it's own options under the Tool Tab (A), so be careful when moving to a different tool...

But when you're trying to find that right asset in among 41 layers, counting shadows, a few Groups - a Very Helpful in tool in Organizing layouts, especially when you're going to move a little here, tweak a little there.  It can be very hard to figure out which layer is which.  So switch the MOVE tool back to Pick a Layer or Guide, and click on the asset you are looking for.  This will highlight it in the Layers Panel, even if it is inside a collapsed group.  GIMP will automatically expand the group.

Perhaps some of why I'm feeling like I'm discovering new things is also due in part to the fact that my GIMP icons are not resizing and are so tiny, tiny, tiny....Did I say they were tiny?


And at least within the draft of this blog, even though I selected original size for that compilation photo of how changing the computer's resolution doesn't effect the icons within GIMP...they are still larger for some reason than the application is showing on the desktop.

So this next week's project will be to see if I can connect with some of the GIMP Developers and see if there is a switch or patch or something that will adjust the size of the icons within GIMP to something that a human can actually see.

Praying that my tips on GIMP are useful to someone else as well.  And I'd love to hear some of what you've learned as well.  Leave a comment below, or send me a message.

Enjoy playing around with those Layer Modes, if you haven't investigated them before.

Monday, July 8, 2013

Ways to Cope with Fibromyalgia

I wanted to chat just a bit about ways that I cope with Fibromyalgia. If you're interested, head over to my personal blog @ Laura Wellinghoff Studio.

I'm also playing with a few designs this month for a Designer Challenge over @
Pixel Scrapper Digital Scrapbooking. The theme is Christmas in July.

I'm not sure how quickly I'll get things done, this month is going to be busy, and I'm pretty particular about my pieces...so time will tell.

Friday, June 28, 2013

2013 Fibromyalgia Awareness EXTRAS

Well, in the midst of all the commotion this week around the house, I still was able to find just enough time to finish off a few extras to my Fibromyalgia Awareness kit.  But I wasn't able to package them up until after my brother and his family left this morning.

So here you go, perhaps you'll be able to find just a few mins to kick back, destress, and enjoy using these as you scrap some of your happy memories.

Each item in this EXTRAS kit is included in all the colors of our palette.  I've also tagged the items in Picasa for you.  (Picasa is a free program if you need something to help you organize your photos and digital stash.)

Also just this afternoon, I was able to figure out how to give you direct download links.  So if you are interested in downloading this portion, just click the preview photo.


Saturday, June 22, 2013

Fibromyalgia an auto-immune???

There is some research saying that FM is an auto-immune disease.

Many have asked what is it like with Fibromyalgia?  My response, have you ever had the flu?  I mean like my son has at times, HIGH fevers, 103+....that lays you out for several days.  Not just physically, but mentally puts you in la-la-land?

Well, I'd much rather get the flu!  Because it's then that I actually feel better!  Even if I just get a horrible head cold, it's like my immune system finally kicks in and fights something else instead of fighting myself.

Thursday, June 20, 2013

Fibromyalgia Awareness Links

UPDATED 2013/07/03

There are all sorts of help and resources for Fibromyalgia now days.  Something that in the past was lacking.

FYI: Fibromyalgia is no longer under the Arthritis Foundation.
I believe this is not just because Fibromyalgia really doesn't deal with inflammation, but also it is more widely known, and the medical field has learned more about the condition.

Also with the age of information, more are becoming at least familiar with the condition as it's easier to find things on-line that discuss it.

Time for a disclaimer...I will say that I don't believe or agree with all the things mentioned or discussed at the following links.  Fibromyalgia is NOT just in their head - though there is brain fog, or Fibro Fog.  Also I've seen each case be different in how it effects or complicates things, in other words each person can be effected in different - many different ways.

The other trouble is it is a CHANGING condition...not only is it true that what works for one patient may not be effect or help another at all.  BUT within each patient the condition can change from day to day, even hour to hour.  Might be fine, ready to run a marathon, and then all of a sudden can't seem to even walk to a chair to sit down.  This not only makes things difficult for others to understand and offer help or encouragement, but this is one of the hardest things for the individual to "manage" because it's constantly changing.

I plan to share more throughout this month about managing with the condition, so please come back for a visit or two.

Laura
**************** NEW **********
If you are on Pinterest, you might be interested in my Fibromyalgia Board.
As of now, I've not got a lot pinned, but as with anything, more as time goes on.

You might also want to check out this group...

National Fibromyalgia & Chronic Pain Association

There are also on line support groups....

Good for the beginners and newly diagnosed:
http://groups.yahoo.com/group/flyingwithfibro/

 This group offers support for those with the chronic condition with a focus on housework and dejunking system in 15 mins increments, so that you don't over do.  Though I'm still receiving these newsletters, I only participate when I need to.  BUT I still use a 15 mins work cycle throughout my day.

A group on Facebook


Mayo Clinic articles


2013 Fibromyalgia Awareness kit

Update: Aug 1,2013 ~ WOW...I just realized that in the Word Art preview, it looks like there is a miss spelling of the text
When you lie down, 
you will not be afraid;
when you lie down, 

your sleep will be Sweet.

Let me assure you that the previews are just a taste.  There are no miss spellings, and the word art is also available in .PNG format, offering the advantages of transparencies.

*************
Yes, I've got another freebie for you this month!  WOW...it's been a lot, something I had planned NOT to do.  I told myself I'd do some every other month, but not two months in a row.  So WHY you might ask did I do another kit in the SAME MONTH?  Well, this kit is for Fibromyalgia Awareness!  Something that affects many, and so I decided in the midst of everything else going on, I'd have to climb aboard!  At least with a little bit.

This blog train is hosted by Digi Blog Train Lists, inspired by Leterati Artful Scraps

I would like to welcome everyone to my blog.  There maybe new folks here, those that are some how effected by Fibromyalgia, or you may just be digital scrappers looking for some freebies.

NOTE TO EVERYONE: We've been having troubles maintaining our internet connection, and are in the process of finding a fix.  So if you experience troubles, please hold on, I WILL get to you and help you out as soon as I can!  If you'll comment, I promise to get back to you, so leave enough information for me to do that, and a description of your troubles.

If you are new, please check out my TOU here, or in the zip files.  Also I've got instructions on how to download from Google Drive here, if you need some help.  I break up my downloads into several pieces, to keep them small, so hopefully Google Drive will scan them for you.  Though I'm "virus free", I practice cautious downloading myself, so I would expect those interested in my designs to do the same thing.  So be sure to get all the parts you want!

ALSO: Please Come back, as I hope to put up more items for this kit soon.
1) Mainly because of the internet troubles we have been having, it's caused me to run out of time before the go live date!
2) I also plan on adding some info on Fibromyalgia, and how to manage.  This condition has effected and complicate life for many, including myself.  My mother leads a local support group in southern Missouri as well.  So if you or someone you care for needs some good tips, or links to places on-line that we've found helpful, be sure to visit again.

We are also busy helping some friends with a "Backyard Bible Club" this week, so like I said before, I'll get back to you as soon as I can.  Don't worry, I'll continue to work with you until you've been successful in getting all the parts of the kit that you are interested in.

Thanks for coming by, you might also want to jump over to browse my other blog.  AND Thanks for the interest in my designs.

This is the preview that was shared, but as you'll see, I've given you other previews showing more items.  There are several pieces, so let me walk you through them, and you can choose one or all if you like.


Now on to the kit pieces!
*********************


Elements and Word Art Combined into one file.


Because I needed more downloads, for the virus scanning, I've NOT made the photo's clickable.
Here's my links again.
LPW~2013-06-Fibromyalgia-DBTL~Elements&Wordart-S4O.zip

Come again soon, and I'd love to hear from you if you enjoyed the kit.

UPDATE:  I just realized in my rush to get this post ready for the launch, I didn't include the color palette in my zip files.  So if you are interested, I do know that there are a few others that HAVE included it in their portions, or you can go June Blog Train details...
*********************
If you get lost, here's the entire list.


Patty B Scraps
Mama’s Designz
Becky’s Creations
Dakota Winds Graphics
Shuckclod’s Stuff
Xelax Scrap Free
Touched By A Butterfly
Sugarbutt Designs
Kreations By Sparky
Jenny’s Designz
Marniejo’s House Of Scraps  ***Link fixed
Star Creationz
CL Graphics
FB Queen JJ Creations
Aprilthescrapaholic
Leterati Artful Scraps
Caroline B.
Made By Keuntje
Speyegull Designs
Callaluna Creations
Misplaced Mermaid
Crazy Tiffs
Designed By Laura Wellinghoff  ***** YOU ARE HERE*******
Jody M Designs
Dezines2Amaze